

August 16, 2026
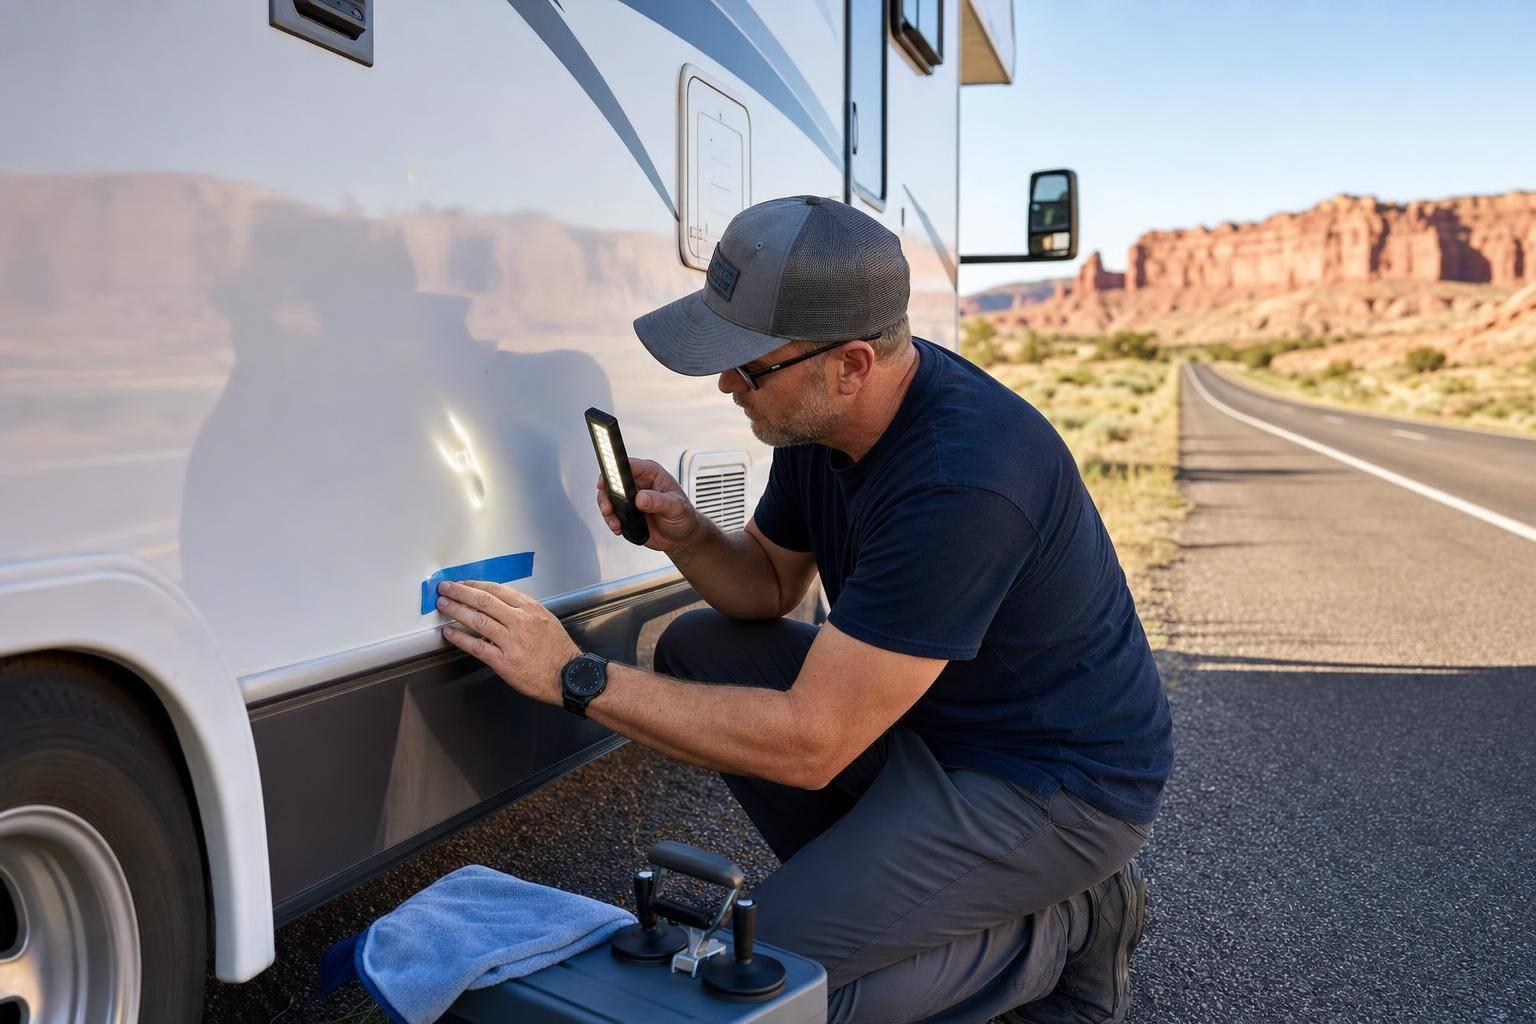
A small RV dent can turn into a leak, rust spot, or panel problem before your trip is over. If the paint is intact, paintless dent repair (PDR) may fix it in as little as 1–3 hours. If the paint is cracked, the metal is creased, or a seam is open, you’ll likely need body repair, panel work, or collision repair.
Here’s the short version:
What I’d check before leaving:
| Damage Type | Best Next Step | Can I Drive? | Notes |
|---|---|---|---|
| Small dent, paint intact | PDR | Yes | Often the fastest shop fix |
| Dent with chipped or cracked paint | Body repair | Yes | Seal the spot first to help block rust |
| Creased or stretched metal | Panel/body repair | Maybe | DIY pull tools can make it worse |
| Damage near seam, window, or roof seal | Shop inspection | Yes, but avoid rain | Leak risk is higher |
| Slide-out, compartment, or panel out of line | Collision/frame repair | Only to a repair shop | May point to frame or support damage |
A dent is not always just cosmetic. If I see broken paint, seam gaps, or movement issues, I’d stop guessing and get it checked before the trip gets more expensive.
Once you know which repair fits your RV’s material, take a close look at the dent itself. Don’t just glance at it and head out. A small dent can hide bigger problems, and the sooner you spot them, the easier it is to pick the right fix.
A quick check now can help you avoid leaks, panel trouble, or a trip that gets pushed back. Start by washing and drying the area so dirt and water spots don’t cover up damage.
Use low-angle sunlight or a flashlight to make the dent stand out. Then inspect the roof, sides, doors, and storage compartments one section at a time. It also helps to check the trim, glass, and seals nearby for signs of impact.
Run your hand over the area too. Sometimes damage is easier to feel than see, especially if the panel looks fine at first glance.
Some dents are just ugly. Others point to damage that needs attention before you travel. Watch for:
Take photos from a few angles for insurance or repair records. Those warning signs can help you figure out whether the dent is a fit for PDR, needs panel repair, or calls for bodywork right away. If you spot any of them, it’s smart to skip the delay and go straight to a repair shop.
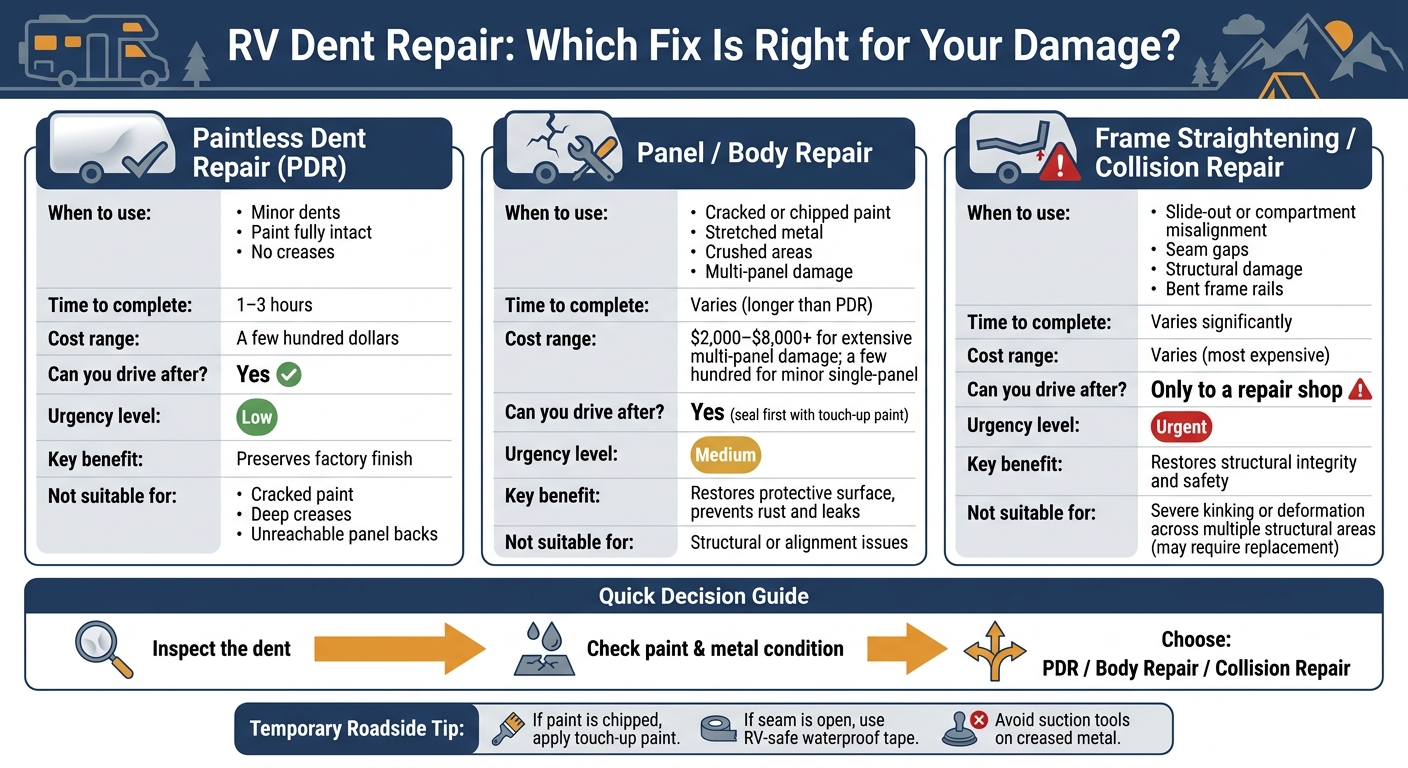
RV Dent Repair: Which Fix Is Right for Your Damage?
The right fix depends on the type of damage. A small cosmetic dent calls for one approach. A crushed panel or bent structure calls for another. In simple terms: minor dent = PDR, damaged panel = repair or replace, alignment issue = collision repair.
Use PDR for minor dents when the paint is still intact. In this process, a technician reshapes the metal from behind the panel without sanding, filler, or repainting. Some minor jobs can be finished in as little as 1–3 hours.
That matters because PDR keeps the factory finish in place. If you caught the dent early and the paint hasn't cracked, this is often the cleanest fix.
But there's a limit. If the paint is broken or the panel has a deep crease, PDR usually won't do the job. At that point, body repair makes more sense.
Once the paint is cracked, the metal is badly stretched, or the back of the panel can't be reached, traditional body repair is the better option. That usually means repairing the damaged area and repainting it.
Sometimes repair isn't enough. If the damage is severe or the sidewall has been weakened, replacing the panel is the safer move instead of trying to patch it.
Cost can vary a lot based on how far the damage spreads:
If the dent starts affecting alignment or reaches more than one structural section, you're no longer dealing with a cosmetic issue.
Structural damage needs collision repair. A frame shop can straighten bent structural rails, and in some cases the frame can be repaired without replacement.
That said, not every frame can be fixed with a simple straightening job. Severe kinking, damage to impact-absorbing sections, or deformation across multiple structural areas may be too extensive to repair safely.
At that point, don't guess and don't push through another long drive. Stop and get a professional inspection before driving.
Do not drive long distances until a professional checks the structure.
If a dent shows up in the middle of a trip, the goal is simple: keep it from getting worse until a shop can look at it.
Start by washing and drying the area with car shampoo and a microfiber cloth. Once the panel is clean, check it in angled light so you can see the dent’s outline more clearly.
If the paint is chipped, add touch-up paint or clear coat as a short-term seal. That can help slow rust until the panel is repaired. If you notice a gap around a seam, seal, or window edge, cover it with RV-safe waterproof tape to help block water from getting in.
Don’t use suction-style DIY tools on creased metal or cracked paint. That kind of damage needs shop repair, and suction tools can make stretched metal worse.
| Dent Category | Short-Term Action | Recommended Repair | Urgency | Drive? |
|---|---|---|---|---|
| Shallow metal ding, paint intact | Clean, dry, and monitor | Paintless Dent Repair (PDR) | Low | Yes |
| Cracked or chipped paint | Seal with touch-up paint or clear coat | Professional RV Body Repair | Medium | Yes |
| Seam, seal, or window damage | Cover with RV-safe waterproof tape | Professional RV Body Repair | High | Yes, but avoid rain |
| Slide-out or compartment won't move | Keep the slide-out closed | Frame Straightening / Collision Repair | Urgent | Drive only to repair |
If the dent affects seals, structure, or movement, skip the DIY route and head straight to a repair shop.
A panel that feels soft or gives way can point to composite or structural damage. Soft spots, cracks, seam gaps, or movement issues with a door, compartment, or slide-out all mean the RV should be inspected before you drive farther.
If you’re in Utah, or just passing through, a local RV shop can help you figure out the next step fast. Dent Master Collision in Lehi, Utah works on RVs and motorhomes, including body repair, frame straightening, and paintless dent removal. They serve Lehi, Salt Lake City, and nearby areas.
Their free online estimate is a simple place to start. Send in photos of the damage and get a ballpark idea of repair cost and timing without leaving your driveway. That makes it easier to decide what to do next.
Start by checking the damage. From there, the choice is usually pretty simple.
If the dent is minor and the paint is still intact, PDR is often the fastest professional fix. It also keeps the factory finish in place, which matters more than many RV owners think.
If the paint is cracked or the metal is creased, traditional body repair is the right move. It restores the protective surface and helps prevent rust and leaks.
So inspect first, then choose PDR, body repair, or a temporary fix based on what you find. The best repair is the one that fits the damage and protects the next leg of your trip.
Look for signs that the paint or metal has been damaged. Cracked or chipped paint, sharp creases, or metal that looks stretched often means the problem goes beyond the surface.
Some dents are just cosmetic. But even then, hidden paint damage can break the clear coat and lead to oxidation or rust over time. And photos don’t always show the full picture. That’s why the most reliable way to judge the damage is with a professional in-person inspection.
No. Fiberglass RV dents usually can’t be fixed the same way as metal.
Paintless dent repair is a metal repair method that pushes or pulls a dent back into shape from behind. It only works when the paint is intact and the panel hasn’t been creased or stretched. Fiberglass doesn’t react the same way, so it usually calls for fiberglass-specific repair.
Insurance may cover RV dent repair before a trip if the damage came from a covered event in your policy. A common example is hail damage covered under comprehensive coverage. The key issue isn’t just the dent itself. It’s what caused it and what your policy says.
In most cases, you’ll need an in-person inspection along with a repair estimate. If you’re not sure where you stand, start by reviewing your policy and getting an estimate first.
